I Built A Free App To Use The RAW AI Denoising Engine Apple Built for macOS27 Golden Gate
 Andy Hutchinson
3 min read
Andy Hutchinson
3 min read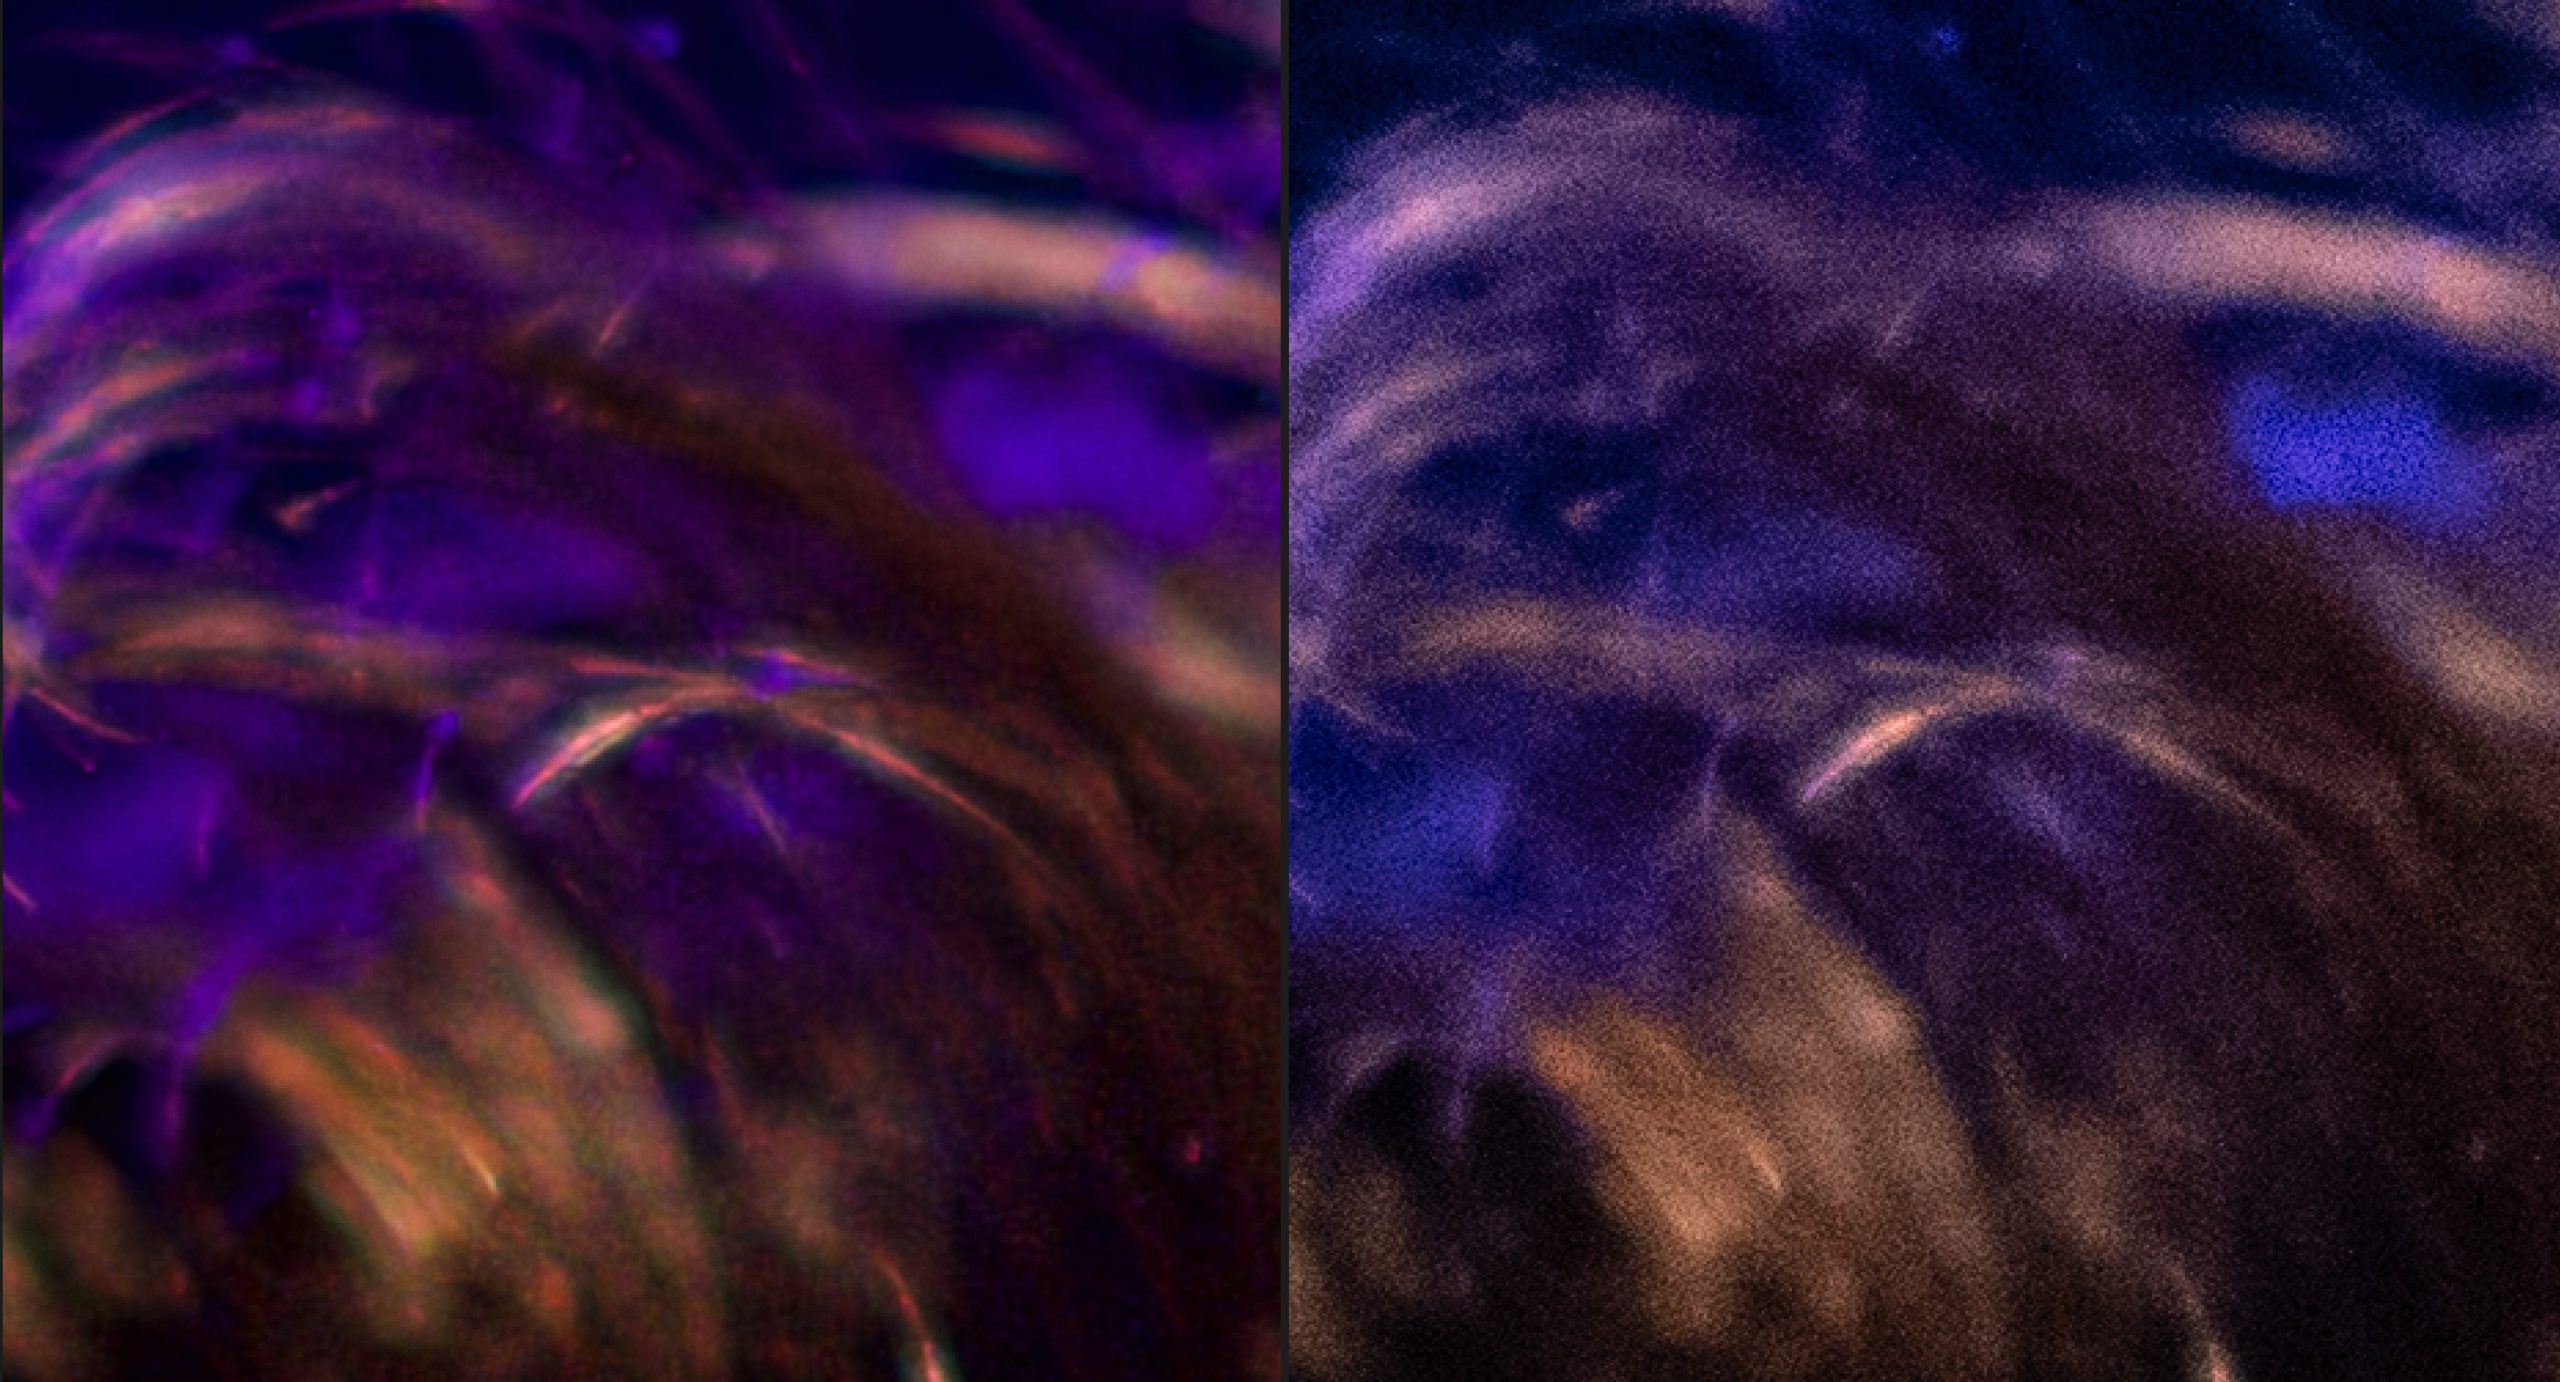
A few months ago I wrote about RAW 9, the long overdue update to the RAW library in macOS. Apple have now released macOS 27 Golden Gate and the public version is available to everyone. I’ve been running the beta for the last three months, and during that period I built a little test bed to see what RAW 9 was actually like.
All we had up to that point was a bit of footage from one of the Apple developer conferences, where an engineer showed off the software, how to use it, and what sort of results you were likely to get from your photographs. I wasn’t satisfied with just having Apple tell me. I wanted to see it for myself. So I built a little test bed and now I’ve upgraded it so you folks can try it.
Why this matters
The big deal, of course, is that we’ve now got parallel demosaicing and denoising in the operating system, and the denoising is AI denoising.
What was very interesting to me is that they’ve done such a sympathetic job with it. It doesn’t take away the soul of the photograph in the process. A lot of these AI denoise models, if you let them run the way they want at full strength and you don’t pull them back, the results are too glossy. You just flush all the soul out of the photograph and it loses all its character.
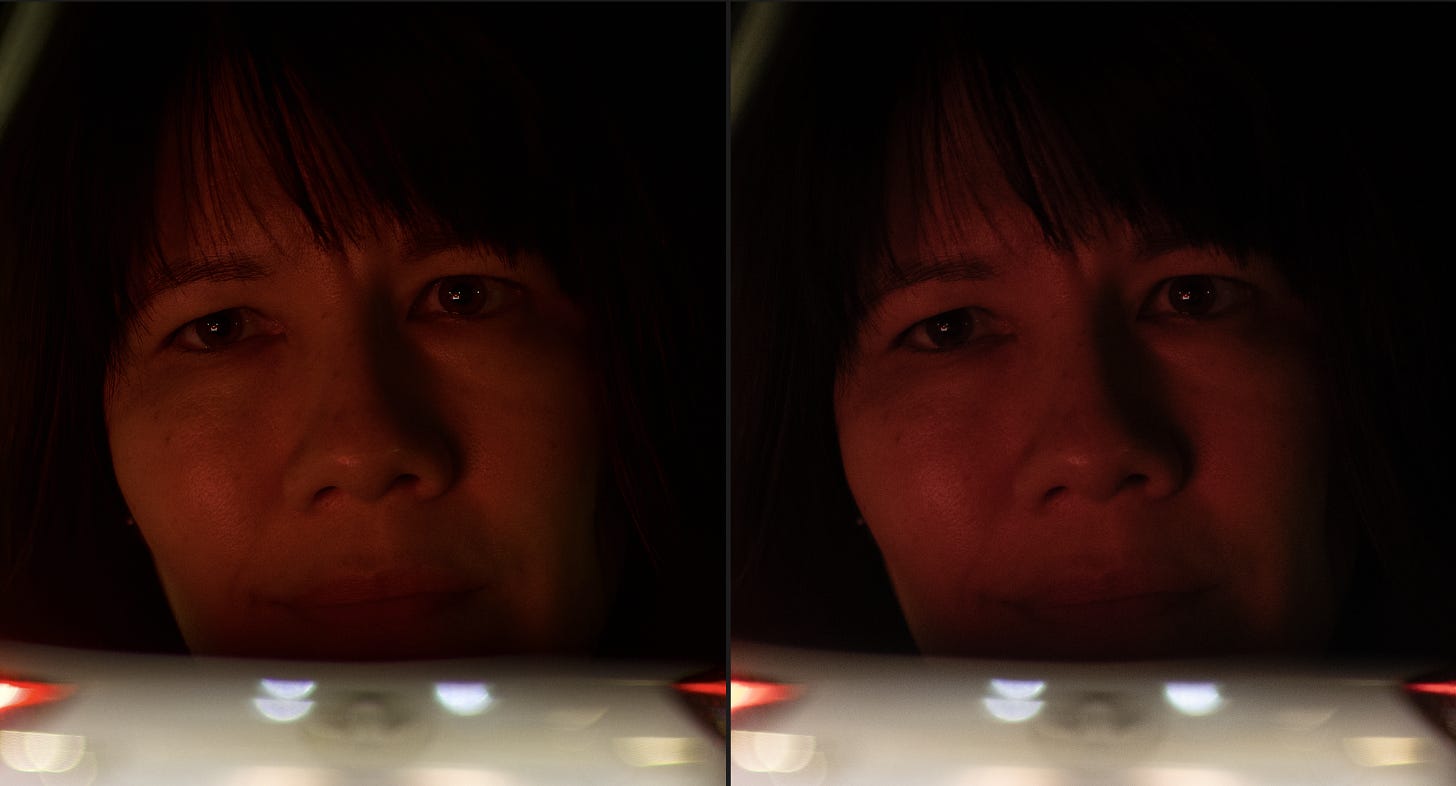
It’s been rather disappointing to discover that Apple haven’t enabled it in any of their own apps. It’s not in Apple Photos. It’s certainly not in Photomator or Pixelmator. In fact, as far as I’m aware, there is no app at the moment that processes them. Correct me if I’m wrong.
I didn’t think this was a fair or equitable state of affairs. I wanted you lot to be able to try this for yourself. So I’ve retooled that little test bed app I made for RAW 9 and turned it into a fully notarised macOS 27 app.
The Caveats
Because this is macOS 27, it’s Apple Silicon only. There’s no Intel compatibility in Golden Gate whatsoever, so of course this app will not run on any Intel machines.
The other caveat is the camera list. There’s a button in the app that gives you a readout of all the different cameras currently supported. There are 69 of them. I had thought Apple would pull their finger out and make rather more RAW files compatible with RAW 9, but alas, they have not.
The Walkthrough
It’s a very simple app. Drag your compatible RAW photos onto the little window and you get a preview in the middle.
I strongly suggest you leave all of the sliders alone. I put them there because I know that if you’re anything like me, you like fiddling with sliders. But for the first few times, leave them be – particularly the one marked luminance noise reduction because it has nothing to do with the AI denoising in RAW 9.
The AI denoising is a simple on/off toggle and it’s toggled always on. The luminance noise reduction slider is the old style slider. It’s in there because that’s part of the new RAW 9 package, and you can apply it on top of the AI denoising if you want. I’d leave it off.
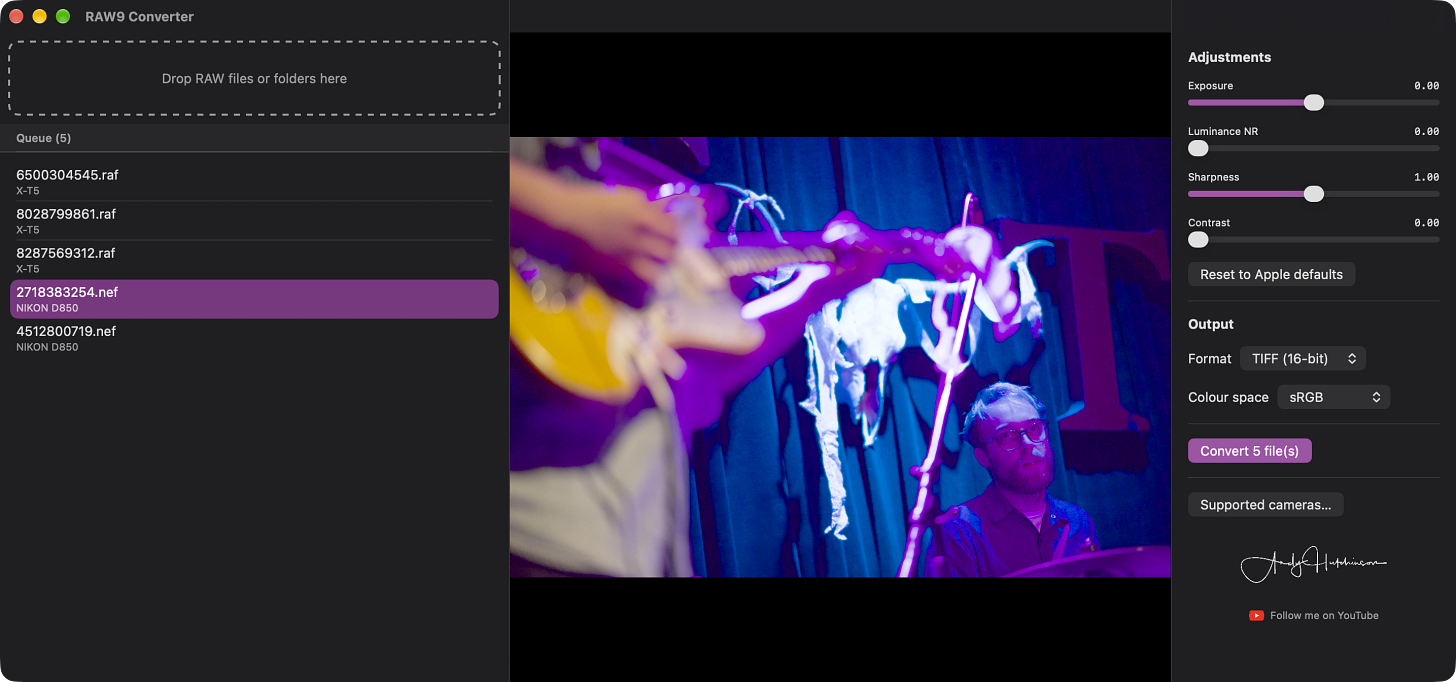
There are four output options: 16-bit TIFF, 16-bit PNG, JPEG and HEIF. Choose whichever you fancy. I’ve got mine set to TIFF because that’s obviously the highest quality, and you can also switch to Display P3 output if you want a wider gamut option. Then hit Convert.
Let me know how you get on!